STEP BY STEP INSTRUCTIONS
Now that you have added your header, you can create your Custom Field.
1. Go to: Configuration >> Custom Fields.
2. Run your mouse over the green options icon and click New Custom Field.

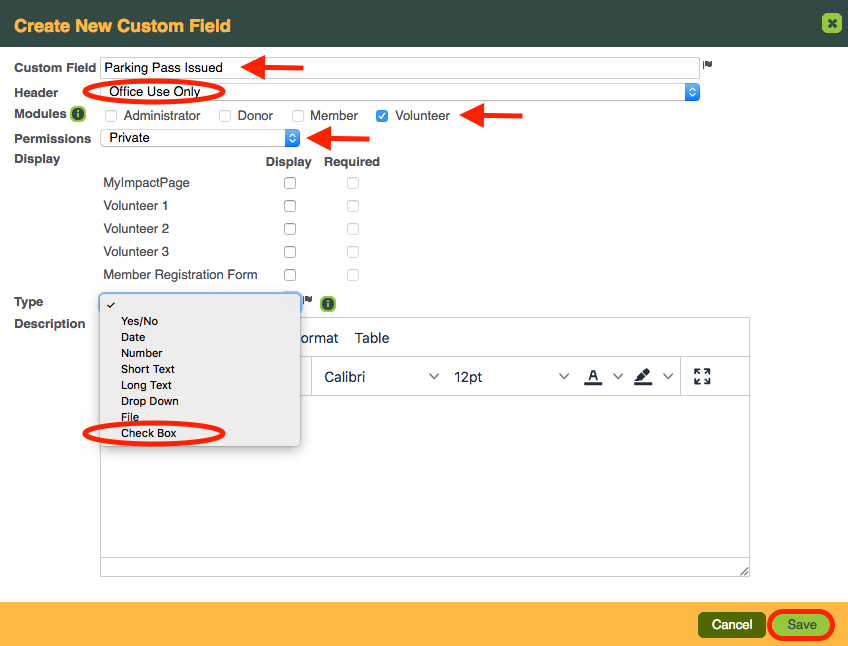
3. Enter a Custom Field name.
4. Select the header from the dropdown box.
5. Select the modules that will use the Custom Field.
6. Select the permissions for the Custom Field:
-
Private: only accessible to the administrator
-
Read only: data entered by the administrator can be seen by the volunteer but not edited
-
Read/write with approval: data entered by the volunteer requires approval by the administrator
-
Read/write without approval: data entered by the volunteer does not require approval
7. Select where you would like the Custom Field to display
-
MyImpactPage.com: select whether or not this Custom Field will appear to volunteers when they edit their profile and whether or not a value is required
-
Application Forms: select the application forms on which this Custom Field will appear and whether or not a value is required by those filling in an application (Just getting started – just choose Volunteer 1)